12.29.2008

Black, White, and Red-olutions

If you're like me, you plan weeks ahead for all the productive things you're going to accomplish over holiday breaks. However, that list usually goes out the window in favor of watching tv marathons (24 hours of A Christmas Story on TBS, hecks yes!), catching up on movies/chick lit, and eating Mom's holiday sweets. Another winter vacation tradition that's come to pass over the years is eschewing traditional Christmas morning gifts in favor of post-holiday sales. Always on the hunt for a bargain, I've been searching for the perfect pair of heeled combat boots to pair with girly frocks and tulip skirts for weeks. Santa must have heard my wish because I scored an amazing pair of Kors combat boots on sale at Intermix!


The best part is that they zip up the side, so I won't be scrambling to tie the laces and fasten the buckles when I'm running late for my morning class.

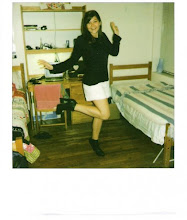
My apologies for being extremely lazy in crafting this vacation, but a new year brings new resolutions. Everyone claims New Yorkers dress in all black, and I've come to realize that I've totally fallen victim to the stereotype. In 2009 one of my goals is to incorporate more color into my daily wardrobe. Now, I know white isn't a color per se, but it's not black. I've fallen more in love with Ann Demeulemeester every season for her classic black and white palate. My second Christmas miracle came in the form of an amazing deal on this Ann Demeulemeester blazer. I just love the black detailing and how the jacket is slightly longer in the front. This piece will be sure to get a lot of wear this coming year.

My other resolution is to be more economical in my spending habits as I'll be an official college grad come May. Since I'll be spending less money at sample sales, I'll just have to get all the more crafty. I'm taking a jewelry making course as part of my studio art minor (gotta love NYU!), so perhaps I'll even share some of my own designs come 2009!

The original Ann D on the runway
xx,CC

12.16.2008

Christmas Corsage

We're all aware that sparkly tanks and short party dresses are essential garments for the holiday party circuit, but what's a girl to accessorize with? If you really want to get into the spirit, take a cue from Dries Van Noten's Spring runway by donning a jingle bell bracelet. Available in gold or silver, this bracelet will integrate seamlessly into your wardrobe. The guests will know the party has really started when the cheery jangle of the bells clicking together announces your arrival!


What You'll Need
:
Jingle bells in assorted sizes
Black ribbon,
approximately 3 yards
Scissors
Hot glue gun


Start by making the bunch of bells that will sit on the back of your wrist. Slide to the center of the ribbon about 5 of the larger size jingle bells, then tie a knot. This creates the base off which you'll string the rest of the bracelet.


Using a hot glue gun, place a few medium size bells in the bunch for a fuller look. String bells through the ribbon on both sides of the bunch. Work your way from larger bells to smaller, stopping when the length of the bracelet fits around your entire wrist.


Tie the ribbon in a larger bow on the inside of your wrist. For a more dramatic flair, tie an extra piece of long ribbon around the knot.


Happy Holidays!

xx,CC

12.10.2008

The Hills. The City. The University?

Congrats NYU Fashion Business Association for a great fall fashion show!


Don't let the girls from "The Hills" fool you into believing fashion is a brainless industry. Those headsets are dang hard to operate. Seriously, I don't think NYU should have let me use one before earning my degree. Props to Whit for mastering the use of her headset.

Who else is excited for the premiere of The City on Dec. 29?

Yes, I know the premiere date...

No, I'm not ashamed... *looks around nervously*

Whitney was always my fave.

xx,CC

12.04.2008

Beaming Beamon

Vicki Beamon and Karen Erickson are well known for their jewelry line Erickson Beamon, but did you know they made home decor as well? Karen Erickson is single handedly responsible for coining the term "chandelier earring" in the 1980s after her designs, but her passion for chandeliers went one step further.

Behold, the Glam Rock Chandelier.


The antique brass based chandelier is dripping in Japanese glass pearls and Swarovski crystals. The piece has been on display in London's Victoria and Albert Museum for nearly 20 years, and it can be yours for the mere price of $32,500.00! C'mon, everyone needs a designer light fixture to properly see their couture garments underneath. Don't quite have the funds for such an extravagant purchase? Neither did Mama Couturiere. Wanting to spice up an old Williamsburg chandelier in her bathroom, she drew inspiration from this true objet d'art. Now we all know the origin of my creative genes...thanks Mama Couturiere!

What You'll Need:
Lighting fixture
5 strands garland (each 6 ft long)
Scissors

Whether you use a chandelier with mini shades or one lamp, start by cutting the outer fabric off the shade. Leave the inner layer of fabric in tact, and you'll be able to see the wire frame of the shade. For a mini shade, cut your 6 ft strand of Christmas pearl and crystal garland in half. Wrap the garland through the wire lamp frame (to hold in place) in a growth like pattern.


Repeat for all mini shades. If you're decorating a single lamp, you'll want to leave the garland long and wrap it in a spiral around the shade.

xx,CC

11.29.2008

The Shredder

When I first stumbled across Raquel Allegra's beautiful shirts I was intrigued by how a basic t-shirt could look like a piece of couture. The fact that Raquel sources her shirts from the LA County Jail adds interesting history and depth to her pieces. Just imagine the story behind that shirt - it was likely worn by a convicted felon while he served kitchen duty, cooking up meals for his fellow inmates! While I'm not brave enough to march into jail and ask for their old, unwanted t-shirts, you can get the same look with a Hanes or Fruit of the Loom undershirt from any supermarket.


What You'll Need:

T-shirt
Seam ripper

Scissors

First, cut the hem off your t-shirt, and style it as desired. You can leave it plain, but I cut a scoop neck and rolled up the sleeves for a more feminine look. Now, decide what section of your t-shirt you want shredded. I found that one side panel (pictured above) or a section of the back usually looks best. Stretch the shirt horizontally between your knees to separate the threads. Take your seam ripper, and pull loose a panel of threads from the bottom of the hem. Using quick, stabbing motions, work your vertically up the shirt, until you have a stripe of loose threads running the entire length of the t-shirt.

I've tried lots of shredding techniques, and found this one works best. Repeat this process for as large a section as you want shredded. After many hours, you'll end up with a one-of-a-kind conversation piece!

xx,CC

Helpful hint: If you're shredding a large section of the shirt, buy one size smaller than normal. The shirt tends to get bigger the more you shred it.

11.22.2008

The Hook-Up

Famed brother-sister jewelry duo Giles and Brother are known for their unique brass and sterling silver pieces inspired by everyday objects such as safety pins, paper clips, horseshoes, and fishing hooks. Most of the men in my life seem to have an affinity for fishing, so I've inevitably picked up some knowledge on the subject. Though a day spent casting for bass in the hot sun and muddy waters sounds less than ideal, this wraparound bracelet is the perfect accessory to sport to a candle-lit seafood dinner. Follow with a romantic post-dinner harbor cruise, and your date will surely see you're the best catch ever!


What You'll Need:
Brass hook
Leather cord

Scissors


Fold the leather cord in half and tie to one end of the hook. Place knots sporadically down the length of the cord. When the bracelet is long enough to wrap around your wrist several times, finish it off with a double knot. Make sure the knot is loose enough that you can work the hook through it to hold the bracelet on your wrist. Cut off any excess string.

You'll reel in the most stylist stares with this tough, yet luxurious bracelet!

xx,CC

11.19.2008

Rodarte + Topshop

Rodarte F/W 2008 (left), Topshop S/S 2009 (right)

Topshop, get thee to New York immediately!

xx,CC

11.18.2008

Diversified Assets

I've heard lots of scary rumors in the past few months regarding the current economic climate. Without a doubt, the most frightening was that bankers at Goldman Sachs hypothesized US currency would become worthless. Can you imagine what would happen to our society if money ceased to exist? Take a cue from Mary-Kate and Ashley by diversifying your portfolio - invest in bullion pieces such as gold and silver, then flaunt your wealth on your sleeve!


What You'll Need:

X-long white shirt
Earrings or two charms
Jump ring

Needle

Thread


Lay the shirt on a flat surface. Fold the fabric vertically, slightly off center. Sew together the fold with a few small stitches. Attach the two earrings together with the jump ring. If you're using earrings, make sure you take off the hooks! Center the connected charms over the fold, and secure them down to the shirt with a few stitches (tip: place the charms so they will hit about at your hip bone level when the shirt is on).


The Elizabeth and James Bullion Slub can be worn open or closed. Personally, I think the draping is what make the shirt unique, so I plan on always wearing it closed. I stitched my shirt together to hold the fold in place, but you can easily unhook the charms by replacing the jump ring with a jewelry clasp. Instead of sewing the shirt fabric together, just make the fold and sew the charms down.

xx,CC

Side note: How much does the Revolve Clothing model look like Blake Lively? Weird. Maybe it's the hair?

11.16.2008

Haute Wheels: Leading the Way!

If, like me, you grew up with brothers around the house, you likely found yourself tripping over their huge mess of toy soldiers, Transformers, and mini racing cars. I never understood the allure of pushing a toy car with your hand while making annoying car noises. However, thanks to a cute feature in last month's NYLON magazine, I finally found a good use for the multitude of Matchbox and Hot Wheels cars now sitting untouched in basement storage. Swiss designer Jackie Heinsohn takes toy racing cars and turns them into turbocharged accessories (sold at a turbocharged price to match). With a few extra materials, you can turn your brother's toy car into a kitschy cool bracelet for under $10. Shhh, you don't need to tell him what you're doing; he's too busy playing X box to notice one of his prized childhood Hot Wheels is missing...


What You'll Need:

Toy car
Charm

Metal chain (approximately 4.5 inches)

Two jumprings

Two pieces hardware

Jewelry clasp

Superglue

Pliers


First, flip the car on its hood and fix the two pieces of hardware on both ends with superglue. This serves to connect the car to the chain. You can use things such as an earring back or pinback. The key is that the hardware have a flat bottom (to glue to the car) and a hole (to put the jump ring through). Let it dry.

With the assistance of pliers, attach the chain to the car using a jumpring. Attach the charm to the jumpring as well. On the opposite end of the car, attach the chain to the jewelry clasp with a jumpring.


Now you're raring to go!

xx,CC

11.14.2008

When Bloggers Collide

You may have noticed that I try to keep knowledge about my personal life to a minimum on this blog. I rarely photograph myself sporting the items I make because I want you to take my examples and inject your own personal style into re-creating them. However, something so fantastically exciting happened Wednesday night that I can't resist sharing! Part of my duties as President for NYU's Fashion Business Association include finding guest speakers from the industry to give lectures to our members. I sent an email to Scott Schuman of The Sartorialist about a month ago, and he agreed to fit a FBA lecture into his schedule between work gigs in Moscow and Rio.

Scott was so nice, down to earth, and sarcastic - just my sense of humor! When asked about how his blog was first received he recalled"People would think ‘Satirist? Is that a comedy website? Maybe he doesn’t know how to spell?’" He graciously stayed well past the Q&A session, speaking individually to every student who waited in line.

The FBA Executive Board poses with Scott

I was thrilled FBA was able to pull off this event for our members. We even made the front page of the NYU newspaper the next day! If you want to see more coverage from the event check out:


Maybe this Carbon Couturiere has a future career in event planning?

xx,CC

Perennial Favorite

With the temperature dropping on a daily basis, I find myself longing for the warm days of spring. Which also means I'm looking through spring collections! Who could forget Erin Fetherston's runway debut in 2007? She sent girls down her New York runway with the idea that they were "a flower sprouting from a sidewalk in an urban environment." Everything from the petal and tulip skirts to the daisy chain headbands evoked a sense of breezy freshness. Just because you're bogged down with winter wear doesn't mean you have to lose that lightness in your step. With a simple color alteration, and you can wear floral accessories all year round!


What You'll Need:

Wire
Fabric flowers

Scissors


Take your wire and mold it into a circle to create the base of the crown.
Fold the wire flower stems around the crown , working your way around the entire ring. Sew on other details such as small flowers or tie on raffia ribbon bows for a fuller look.

I recommend dark colors, such as black, navy, or eggplant to stay on trend with the current season. Can't you just picture this black crown with a opaque tights and patent heels for a holiday party? The vibe is so Gothic romance, practically right out of a Brontë novel!

Instructions and images via Alix of The Cherry Blossom Girl
Alix's photos are so inspiring, they could slip right in the pages of Lula Magazine!

xx,CC

P.S. Apologies for my recent lack of updates. I've had lots of side projects, school, etc. However, I have some great ideas to bring to fruition this weekend, and Thanksgiving break will serve as a crafting extravaganza (not to mention visits to the best antique stores in GA with my creative partner Mama Couturier)!

11.07.2008

Obama-rama

Move over Jackie O., there's a new first lady of fashion in town! Michelle Obama ignited a fashion frenzy all along the campaign trail. She won over the masses with her accessible buys from J. Crew and H&M, while also garnering admiration from the more sartorially apt crowd with her penchant for designers like Narciso Rodriguez and Thakoon. Now that the new Mrs. O is officially our first lady, her style star is only sure to grow brighter. Rumors are swirling over a potential Vogue cover, and designers are clamoring to get their dresses on her for inauguration day. If you missed your shot to pick up the J. Crew cardigan she wore to an interview with Leno (which sold out the next day, natch), worry not! You can easily achieve Mrs. Obama's conservative-yet-chic style with a just a few wardrobe staples found in every girl's closet.


What You'll Need:
Brooch
Cardigan


It's pretty self explanatory, but...


Button the top button of your cardigan and cover with a decorative brooch. Now that's a style statement sure to make Americans proud!

xx,CC

11.03.2008

Adventures of Agent Skully

Ever have those moments where you reach into the back of your closet and pull out something you totally forgot you had? It's like finding gold in a pan full of rocks! This morning I found my homemade Alexander McQueen skull scarf buried behind a stack of sweaters. This scarf was seen adorning the neck of every celeb and socialite under thirty circa 2005 (see Sienna, Nicole, and Ashley pictured below). Though some may argue the skull trend is "dead," I always enjoy feeling a little extra hardcore walking the streets of NYC (read: I am not hardcore and need all the help I can get).

What You'll Need:
Large square of chiffon
Pencil

Ruler

Black Sharpie

Skull stencil

First, make your skull stencil on the computer by zooming in on the original scarf. Print off three different images of the skull, all in different sizes. Next, lay your chiffon square flat. Decide the placement of your different size skulls using a ruler. My skulls are about five inches apart. Mark a small dot every spot where a skull should be drawn to make sure the pattern is symmetrical. Next, lay your chiffon over your printed skull image. Trace the skull outline with a pencil. Repeat for as many skulls as you want on your scarf. Lastly, fill in all the skulls with a black sharpie.


Note: In 2005, I was lusting after a McQueen skull scarf so badly that I actually traced the label onto my "impostor." I do not condone this sort of copyright infringement. I've since learned to take a little creative liberty with my designs to make them my own!

xx,CC

11.01.2008

Elbaz Puts on the Razzmatazz

Though things this season seem to be graying (the economy and weather, to name two), Lanvin's Spring/Summer 2009 show was a much needed exception. Never one to disappoint, Alber Elbaz lifted the spirits of fashionable women everywhere with another superb collection. Classic colors and simple cuts segued into a shocking finale of electric blue, leopard, and bejeweled accessories. Signs of a bright future on the horizon? Let's hope Spring 2009 turns out to be. Even if it doesn't, these sparkly heels will help boost your optimism.


What You'll Need:
Black heels (found at Old Navy)
Gold paint

Masking tape

Paint brush

Superglue

Assorted crystals


First, paint the heels of the shoes gold. (Hint: use masking tape to section the heel off from the rest of the shoe, so the paint line is even). Allow to dry overnight, depending on the type of paint you use. Next, organize your crystals and decide the design you want. Lanvin's were very haphazardly placed, so that's the look I tried to channel.

Use the superglue to attach the crystals to the shoe heel. Be sure to cover all four sides of your heel if it's squared.

Slip on your heels and they'll put a little extra jazz in your step!

xx,CC

10.26.2008

Double your pleasure, double your fun

Awhile back I brought to your attention the double belt trend that took the SS 09 runways by storm. A belted dress or tunic is one of the most common looks these days, so you need to add a little something special to stand out. In what is quite possibly my simplest DIY ever, I'll show you how to get the double belt look in less than two shakes of a lamb's tail!

What You'll Need:
Two belts of identical size
(Yep, that's it!)

It typically looks better if you choose belts of different colors and/or patterns. This will give your look an interesting dynamic when paired with monochrome garments. Connect the buckle of belt #1 to the belt hole of belt #2.


Now you're essentially left with one long belt. Wrap it twice around your waist, and buckle as you would a normal belt.

If (like most fashionistas) you have a flair for the dramatic, you could even repeat the look with three or four belts for a more corseted look!

xx,CC

P.S. "That's the statement of the great mint in Doublemint gum!"
(At least those were the lyrics when I was a kid, hehe)

10.18.2008

Tribal Treasure

French interior designer (and baroness!) Rose Anne de Pampelonne's first foray into the fashion world didn't turn out exactly the way she planned. Her line of caftans and tunics were handmade in Nepal, but what did Rose Anne decide to do when the craftsmanship wasn't quite up to her standards? Rip the embroidery off and turn it into jewelry of course! Her embellished pieces, inspired by the foothills of the Himalayas, were right on target with this fall's tribal trend and were received by fashion critics with accolades.


What You'll Need:
1 yard ribbon
3 feathers

Ornate broach or ornament

Hot glue gun

Scissors


First, cut the stems of the feathers down to size. Arrange the feathers in a circular pattern, or however you think they look best paire
d with your broach or ornament. Next, hot glue the feathers to the back of your ornament.


Tip: Use a toothpick to press the feather stem into the glue to ensure it is secure. Finally, loop your ribbon through the ornament and double knot it at the neck.


xx,CC

10.11.2008

Hats On

This season was all about the exposed zipper; from skinny ankle jeans to bomber jackets, you could find zippers just about anywhere. But why not try showing off the trend in an unconventional way - like on your head! This vintage hat by Pretty Young Thing combines the best of old school charm with a modern twist.

What You'll Need:
Vintage felt hat
1 yard black 1/4" ribbon

One 22" metal black zipper

One 22" metal white zipper

Charm, button, or trinket
Hot glue gun

Start by gluing the thin black ribbon around the circumference of the hat. Next, fold one zipper in half (but make sure the ends are not perfectly even) and make a loop knot. Repeat with the second zipper.

Lay one zipper on top of the other cock-eyed and glue together. Glue the two zippers on the side of the hat. Finally, attach your charm to the zipper pull so it hangs off the side. I used my favorite cell phone charm that I bought from Colette in Paris to add a little sentimental value to the accessory!

xx,CC