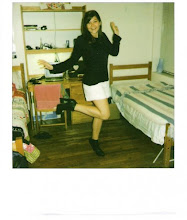
I've been obsessed with these beat-up studded combat boots from Bess NYC, but I am less than keen on the $320 price tag. I walk by the store on my way to class everyday and stare longingly at the gorgeous (over-priced) studded goods. Left with an abundance of studs from my last project (below), I figured there was no better time than the present to fashion my very own pair. Given the snow storm that left Manhattan a slushy, disgusting mess today, they're sure to keep my feet firmly planted on the slippery sidewalks.
What You'll Need:
Boots (think Target or Goodwill)
Pyramid studs
Seam ripper or other sharp object
Pliers
I have a wee obsession with ankle boots, so I folded the tops of my boots down until I got the height I desired. Next, decide the placement of your studs. I followed the curved seam around the heel. With the prongs of the studs, make a mark on the leather where they will poke through. Use the sharp end of a seam ripper to make little holes where the marks were. Now, the prongs of the studs easily slide into the leather. Using pliers, reach inside the boot and flatten the prongs so they won't poke your feet. Continue until you've studded to your heart's desire!
I love using my boots to toughen up flouncy skirts and feminine frocks!
xx,CC
1.28.2009
1.26.2009
Stud Muffin
Ever since Riccardo Tisci accented everything from delicate, chiffon tanks to heavy, leather bombers with large gold studs on the runway at Givenchy's Fall '07 show, the fashion world just can't get enough. Not sure if I was ready to dive head first into the stud tank, I decided to test these babies out on an accessory. Seeing as my staple gold and black bag is in the shop (Chanel will refurbish your old bags and send them back looking brand new; downside is that it takes 8-12 weeks), I was in desperate need of a temporary replacement. Not wanting to break the bank on another investment bag (the saleslady at Chanel kindly suggested I pick up a temp bag to hold me over until mine returns, HA!), I figured I was going to have to resort to alternate options.
What You'll Need:
Black bag
Pyramid studs (assorted sizes)
Seam ripper or other sharp object
Pliers
The fabric on my bag wasn't thick, so I found it easy to poke the prongs through with my hands and bend them closed with pliers. If you can't work the studs through by hand, use the sharp end of the seam ripper to puncture two holes where the prongs will easily slide in. Starting at the center of your bag, work your way toward the outside edge following parallel to the top curve. Next, you will make an upside down triangle. Start from the center stud and make a line of four studs in both direction. In groups of two, work your way down the bag to a point. Now it is time for the larger triangle. Alternating large and small studs, make another line of four studs in both directions above the first triangle. Work your way down the bag in groups of two, just as before, but mix it up by adding a large pyramid in place of two small ones occasionally. Finish the point with a group of three large studs.
The arrowhead-like nature of the triangular pattern makes the bag look much more sophisticated than others with haphazardly placed studs. I think it gives off the perfect undertone of Native-American-meets-modern-New-Yorker. Yes, I'll get along just fine with this until my precious baby returns from the Paris shop looking buffed, shiny, and sparkly.
xx,CC
__________
While you're sprucing up your handbags with flashy and eye catching garnishes, why not do he same to virtually any outfit you own? Hop online to find chic and highly affordable jewelry, for half of designer prices. Check out anything from custom pieces to diamond engagement rings.
__________
While you're sprucing up your handbags with flashy and eye catching garnishes, why not do he same to virtually any outfit you own? Hop online to find chic and highly affordable jewelry, for half of designer prices. Check out anything from custom pieces to diamond engagement rings.
1.22.2009
Acid Trip
Blame it on Kurt Cobain. His soul may be resting in a better place, but his grunge influence is still alive and thriving on the runway. A while back I mentioned Karen Walker's take on the acid wash jean, which took on a western-whimsy vibe styled with a fringe bag and ruffled blouse. It was not until I saw the skinny jeans on the runway at Balmain, however, that I really got the bug to whip up a pair for myself. Christophe Decarnin paired his hipster dungarees with embellished blazers and sky high ornate sandals for a decidedly '09 (not '89) rock chick feel. Now that's Nirvana.
What You'll Need:
Skinny jeans (found at Target)
Household bleach
Plastic gloves
Paper cup
Scissors
First, take your scissors and distress the denim as desired. I cut a hole in the knee as well as a few slashes on the front and back pockets. Pull out the loose threads to give the holes a frayed quality. Next, thoroughly wet your jeans in the bathtub. Wring them out, then lay them flat in the tub. Poor the bleach into a paper cup. Put on the gloves (bleach can burn your skin!) and gently splash small quantities of the bleach all over the jeans. Flip the jeans over and repeat. Wait approximately 5-10 minutes... the longer you wait, the more faded your jeans will look. Turn on the faucet and rinse the bleach out of your jeans. Throw in the washer and tumble dry low!
xx,CC
1.21.2009
"una gurú de las artesanías"
Many thanks to the fabulous Gabriela at NYLON Mexico for featuring Carbon Couture on the site. If you were forced to choose between make up or perfume for the rest of your life, which would you pick? For all you Spanish readers out there, head on over to find out what I said. For those of you who don't, I guess you'll never know...
I will, however, leave you with my favorite phrase automatically translated by Google. When asked what was one item I cannot live without I said:
English: Does my Blackberry count? I’m a BrickBreaker master! I’m also addicted to Starbucks skinny caramel lattes. I cease to function if I don’t have at least one per day.
Spanish: ¿Mi Blackberry cuenta como articulo? ¡Soy una master del BrickBreaker! (risas) También soy adicta al Caramel Latte de Starbucks. Si no consumo al menos uno al día ¡dejo de funcionar! (risas)
Translated English: My Blackberry account article? I am a master BrickBreaker! I am also addicted to Starbucks Skinny Caramel Latte. If you do not get at least a day! Stopped working! (laughs)
xx,CC
1.20.2009
The English Patience
While all fashionable Manhattanites are waiting with bated breath for Topshop's stateside arrival, my anticipation just reached new heights. Their spring look book culls all the best from spring trends: trash and vaudeville mixed with days on the prairie, all with overtones of daintiness and English class. Being the blazer obsessed girl that I am, I'm already D Y I N G for this floral confection.
This is one item that I won't be able to DIY, so you can bet your bottom dollar I'll have my AMEX ready the second it hits topshop.com!
xx,CC
This is one item that I won't be able to DIY, so you can bet your bottom dollar I'll have my AMEX ready the second it hits topshop.com!
xx,CC
1.19.2009
Are You a Wangster?
If I was currently in a climate where the temperature is above 10 degrees (read, not Manhattan), I would be all over these babies. Shredded denim + chain + Alex Wang = bliss.
Unfortunately, all my summer duds are stored away until May. Head over to Park & Cube for a simple tutorial. You'll come out looking like a BAMF - so fierce that no one on the street will dare mess with you!
xx, CC
Unfortunately, all my summer duds are stored away until May. Head over to Park & Cube for a simple tutorial. You'll come out looking like a BAMF - so fierce that no one on the street will dare mess with you!
xx, CC
1.16.2009
No Hassle Tassels
A little bit country, plus one part grunge, add a dash of Parisian sophistication, and you've got what Marc Jacobs equates to "the joy of dressing up" with his Spring 2009 collection. And dress up we will! While many designers took the minimalist approach to reflect the economic downturn, Marc laughed in its face. With models sauntering down the catwalk in tiered skirts, over embellished bags, lurex belts, and armfuls of bangles, Mr. Jacobs definitely took the more is more approach to dressing. No item of his collection screams for attention more than the enormous tassel earrings that dangle dangerously close to the shoulders. And although every business around the world is downsizing, there is no reason your accessories should!
What You'll Need:
Two tassels
Two earring posts
Two head pins
Safety pins (approximately 30)
Jewelry wire
Various color/size beads
Hot glue
Scissors
Start by attaching the earring post to the loop of head pin, which will serve as the base of your earring. String a large bead or stone onto the head pin, then push the pin through the top center of the tassel. Flip the tassel over and put a dot of hot glue on the underside of the head pin. Then slide a bead onto the pin so it sticks to the glue. This bead will be hidden by the fringe, but ensures the tassel will not slip off the post. Snip off any excess length of the pin.
Next, open the safety pins, slide on your decorative beads, then close the pins. Take about 12" of jewelry wire, and begin sliding on the safety pins, alternating with round beads. I added a plain safety pin next to every beaded one to achieve a fuller look like the Marc earrings. When there are enough safety pins to cover the circumference of the tassel, loop the wire through one of the round beads forming a circle.
These ornate tassel earrings will surely lift your spirits - and ensembles - for the remaining months of winter!
xx,CC
What You'll Need:
Two tassels
Two earring posts
Two head pins
Safety pins (approximately 30)
Jewelry wire
Various color/size beads
Hot glue
Scissors
Start by attaching the earring post to the loop of head pin, which will serve as the base of your earring. String a large bead or stone onto the head pin, then push the pin through the top center of the tassel. Flip the tassel over and put a dot of hot glue on the underside of the head pin. Then slide a bead onto the pin so it sticks to the glue. This bead will be hidden by the fringe, but ensures the tassel will not slip off the post. Snip off any excess length of the pin.
Next, open the safety pins, slide on your decorative beads, then close the pins. Take about 12" of jewelry wire, and begin sliding on the safety pins, alternating with round beads. I added a plain safety pin next to every beaded one to achieve a fuller look like the Marc earrings. When there are enough safety pins to cover the circumference of the tassel, loop the wire through one of the round beads forming a circle.
Twist the two ends of the wire together, snip off the excess, then hide the knot underneath the beads; as they would say in Paris, vous êtes finis!
These ornate tassel earrings will surely lift your spirits - and ensembles - for the remaining months of winter!
xx,CC
1.10.2009
Blazin' to Go
Once upon a time, there lived a young girl obsessed with designer clothes. She always did well in school, performed her chores, and cared for her younger brother. Her parents rewarded her with monthly shopping trips to Neiman Marcus, Saks, Barneys, and other department stores. When she began to think she might like to work in fashion for a living, her parents generously allowed her attend college at NYU and spend her summers interning at fashion companies. This girl knew that one day the gravy train would come to an end, as her parents would not support her spending habits forever, and accepting a job in fashion nearly always ends in poverty. Therefore, she learned to fuel her love for fashion by scouring the best thrift and consignment stores around. She was amazed at the finds she'd accumulated over the years (quilted Chanel flap bag at nearly 80% off retail and Christian Louboutin pumps for $40 top the list)! As the young fashionista's style evolved, she came to realize that a designer label alone does not make an item fabulous. One can look just as good in a $5 blazer from Goodwill as in a $500 blazer by Ralph Lauren, as long as it fits well. From that day forward, the young fashionista built her wardrobe around the good quality designer basics she already owned with cheaper trendy items from Zara, H&M, American Apparel, and, yes, even Goodwill. She saved monetarily and lived stylishly ever after.
And so...in keeping with my 2009 resolution, I present five blazers for $5 each. All picked up at my local Goodwill in a matter of 20 minutes.
xx,CC
And so...in keeping with my 2009 resolution, I present five blazers for $5 each. All picked up at my local Goodwill in a matter of 20 minutes.
xx,CC
Subscribe to:
Posts (Atom)