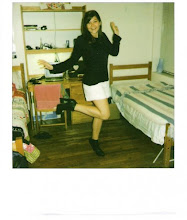
Thank Serena van der Woodsen for single-handedly bringing back the "bobo" - bohemian bourgeois - trend so finely crafted by the twins (you know which ones) circa 2004. This time around, cowboy boots and status handbags have been replaced by chunky necklaces, deconstructed tees, and... fringe. As an update to the flapper staple, Chelsea Flower has created a beaded version to achieve a Native American affect. The result? The perfect piece to wear during your daily routine of picking up bio fair trade groceries and aligning you chakras.
What You'll Need:
Vest (found at TJ Maxx)
Seed Beads
Needle
Thread
Scissors
First decide the color pattern for your seed beads. Next, thread your needle and knot the end. Starting from the inside of the vest, poke your needle through closest to the vertical edge seam. String your beads. Loop the thread back through the beads again from the bottom, but skip the bottom-most bead. This secures the string.
Push the needle and thread back through the vest where you came from the underneath. About 1/2" to the side, bring your needle back up. Bead another fringe string and repeat. repeat. repeat...
xx,CC
8.26.2009
8.22.2009
The Bright Stuff
If you thought neons were for preschoolers (c'mon we all thought LA Lights were the bomb), think again! It is time to make like a highlight kid and sport the trend once again. From über cool Alex Wang to established labels such as Marc Jacobs and DKNY, there is no doubt some of the hottest jewelers got their inspiration straight from the runway. If you feel just a tad ostentatious sporting screaming yellow around your neck, you needn't fret. Even Michelle Obama was spotted wearing one of Tom Binn's creations to an event at the Kennedy Center.
What You'll Need:
Ribbon
Two pin backs
Chain
Charm (optional)
Plastic lanyard (or neon beads, gems, etc.)
Superglue
Pliers
Scissors
I had a whole box full of plastic string leftover from the summer I was going to make a fortune selling lanyards to all my elementary school buds, so I thought the neon shade would be perfect for recreating the feel of Mr. Binn's masterpiece. Start by making four 1.5" circle stitch lanyards. Next attach them together with chain by using pliers to slide the chain links under the side stitches of the lanyard. Drape loops of chain in varying lengths off the bottom chain (again using pliers to open and close the links). On each pin back, loop the ribbon through and superglue it flat on the back side. Attach the necklace links through the pin backs. Tie around your neck and adjust the bow until it hits at your desired length.
xx,CC
8.18.2009
Take A Bow
Summer is KNOT over yet, so take advantage of the warm weather in these ribbon knotted Lanvin sandals! Alber Elbaz certainly had sunshine in mind when designing his colorful Resort 2010 collection inspired by Acapulco, Mexico. Vibrant shades of azure, lime, and watermelon accent beautifully draped black ensembles. The standout pieces, however, are the fully fluffed out shoes! From rafia pom-poms to metallic high-tops, Mr. Elbaz's accessories are designed with the social butterfly (and her hectic schedule) in mind. These shoes were made for party hopping - er walking!
What You'll Need:
T-strap sandals (found at Target)
Two shade of grosgrain ribbon
Four large pearl beads
One packet of small crystals
Prong back settings (available at most craft stores)
Needle
Thread
Pliers
Scissors
First, tie six pieces of ribbon (double knotted) up the front strap of your sandal. Clip the ribbon off at an angle and fray the ends with the edge of your scissors. To attach the pearls thread your needle and double knot the end. Thread through the center of the ribbon knot from the underside. Slide the pearl onto the thread. Push the needle back through the ribbon close to where you made the first stitch. Repeat one more loop to secure, then tie off the thread underneath the grosgrain ribbon.
Finally it is time to add a little bling to the bows. Push a prong back setting through the underside of the ribbon so you can see the prongs poking through. Set the crystal in the middle. Use the pliers to bend the prongs to hold the crystal tightly in place. Repeat for however many crystals you want. I clustered mine around the pearls with a few spaced in between.
xx,CC
8.16.2009
Hear No Evil...
There is no disputing that Barbie has had a major influence on high fashion. She celebrated her 50th birthday last fashion week with a blow-out runway show featuring designs from the likes of Calvin Klein, Anna Sui, and of course Bob Mackie. Apart from the impact her distorted proportions have had on society, she is an iconic symbol of youth and beauty. Thanks to artist, Margaux Lange, the plastic princess "has become the accessory instead of being accessorized." Exploring the darker side of the bubblegum pop phenom, Margaux uses every imaginable doll part to create handcrafted jewelry available for sale on her website. However, if you have some old dolls lying around the house, you can easily put your own spin on these "hear-rings!"
What You'll Need:
Doll head
X-acto knife
Eye pins
Earring hooks or posts
Superglue
Crystals (the size of the ear)
Boondoggle thread (aka plastic lanyard)
Assorted beads
Pliers
Needle
The first step is not for the faint of heart. You'll need to take your X-acto knife and cut the plastic ears out of your doll's head in a large square shape. Then, squeeze some superglue onto the back of your square crystal and adhere it to the back off the plastic ear. This gives the earring a finished look should it twist around while you wear it. Next cut off the excess plastic around the crystal with the X-acto knife.
Take your plastic lanyard and superglue it around the four side of the square. Make sure the plastic overlaps at one corner and trim off the excess. Next, attach your earring hook or post to the loop on the eye pin using pliers. String the beads onto your eye pin in the desired pattern. Take the needle and poke it vertically into the top center of the ear square, where the eye pin with enter. This gets the hole started so it will not be as difficult to poke the eye pin through.
Finally, gently (but with force) ease the eye pin into the hole until it is about half way into the square. At this point you should be able to hold the earring upright without the beads falling off. Dab some superglue where the eye pin sits in the plastic ear to secure the post.
From a distance these look like any other beaded earring, but up close people get a macabre surprise!
xx,CC
8.11.2009
Safety First
No one does ironic jewelry quite like the notably candid Tom Binns. He has a penchant for taking fine "diamonds, emeralds, and shit" and dimming them down with sterling silver skulls and everyday objects such as laminated plastic. Take for instance his Rythym of Cruelty necklace. A pair of preppy pearls turn punk with the addition of a few safety pin closures. A veritable fountain of DIY inspiration, Mr. Binns also debuted a collection entitled "Get Real" at Colette in which he took magazine clippings of fine jewelry and laminated them to create wearable pieces. In a time when it's considered uncouth to flaunt one's wealth, Mr. Binns has come up with the perfect solution for the recessionista!
What You'll Need:
Safety pins
Pearl beads
Seed beads (optional)
Beading string
Two jump rings
Scissors
Pliers
Superglue
Seeing as how I just made a necklace, I decided to make a bracelet version on this go-round. Start by linking together three safety pins. Using the pliers, attach the two jump rings on either end of the chain of pins. Measure your beading string around your wrist (or neck), leaving ample room on each end. Double/triple knot the beading string to one of the jump rings. Put a dot of superglue on the knot (to ensure it won't come undone) and snip off the tail. String the pearls and beads together for the length of your bracelet. Knot, glue, and snip the second end!
If you have an overflow of safety pins and a bit more time on your hands, be sure to try his pin and pearl necklace.
xx,CC
8.09.2009
Colors of the Wind
With the Native American trend infiltrating almost every piece of your wardrobe, from ikat skirts to fringe moccasins, what better way to differentiate from the fad than with Lee Angel's beaded collar necklace? The delicate bead work juxtaposed against a tough metal chain keeps the antique piece looking decidedly New World. Pair it with a maxi dress to feel like an Indian princess or leather pants and a jean jacket for a show-em-who's-chief vibe. There couldn't be a better piece to tie you over during those late night summer pow-wows.
What You'll Need:
Chain link necklace
Approximately 1 yard embroidery floss
Assorted seed beads
Head pins or jewelry wire
Scissors
Flat nose pliers
Superglue
Spread your necklace in one row, making sure all the links are flat and facing the same direction. Take the embroidery floss and tie a double knot at one end of the necklace; snip off the knot tails. Put a dot of superglue on the knot to hold the floss in place. Begin looping the floss around the top of the chain, pulling tightly. After about three loops around the first link, move on to the next. When you reach the end, tie another knot and dot with glue. I found that weaving the floss through the chain first helps hold the links in place while you attach the beaded pins.
If you have head pins, which have a metal stop on one end to keep the beads from falling off, begin stringing your seed beads on in whatever pattern you choose. If you are using wire like moi (because I had it handy and didn't want to waste money), take the flat nose pliers and coil the wire tightly around them a few times to create a stop on one end. Depending on how full you want your necklace to look, make between 40 to 80 beaded pins. I believe mine has near 70. Don't feel daunted, the beading goes quite fast! Finally, attach the beaded pins by coiling the long end tightly around the bottom of each link. Snip off the extra wire, and use the pliers to flatten the sharp end of the coil down.
xx,CC
Subscribe to:
Posts (Atom)